


Peas are pretty easy to grow and they are a great crop for beginning gardeners. Just give them cool, spring weather, composted soil that drains well, and some climbing support. If you’re short on space, peas can be grown in containers, along walls, or trained up corn and sunflower stalks.
This article contains affiliate links. As an Amazon Associate I earn from qualifying purchases.
History of Growing Peas
Peas are one of the world’s oldest crops. The earliest known archaeological finds of peas date from about 10,000 BCE, in what is now Syria, Turkey and Jordan. Wild peas were foraged centuries before they were domesticated as the trellis climbers we know today. Peas were one of the first plants to be selectively bred by farmers, and were the key crop that Gregor Mendel used in the 1800s to figure out how plant genetics and hybridization worked.
Related: The Difference Between Open Pollinated Seeds, Hybrids, and GMOs
Types of Peas
There are many heirloom and specialty varieties of peas available in garden catalogs. Peas come in two basic types: shelling peas and mange-tout peas.
Both types need the same conditions for growing, but shelling peas require that the peas be removed, “shelled” or “shucked” from the pod after harvest. In contrast, mange-tout peas are meant to be eaten whole, pod and all.
- Shelling peas (Pisum sativum ssp. sativum) (also called English or garden peas) produce inedible pods from which large, edible peas are harvested.
- Snow peas (Pisum sativum var. macrocarpon) (also called Chinese peas) produce edible flat pods with small peas inside.
- Snap peas (Pisum sativum var. saccharatum) (also called sugar snap peas or sugar peas) produce tender, edible pods with full-size peas.
Many people prefer to grow snap and snow peas because they are less work at harvest, and you get the edible pod, too.
How to Plant Peas
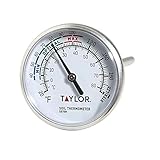
Choose an area of the garden that gets full sun about six to eight hours a day. Then 4 to 6 weeks before the last spring frost, sow seeds outdoors when soil temperatures reach 45 degrees F. (To check soil temperatures, use a soil thermometer.)
Plant your pea seeds 1 inch deep (deeper if soil is dry) and 2 inches apart adding a little mycorrhizae inoculant (see below) to each hole as you go.
I usually plant a double row that is 8 feet long, but only 6 inches wide, with over 100 plants. I grow them up a trellis net placed at the very back of the garden bed. This gives me a lot of food for the space in my garden, and enough peas for my family to eat fresh, canned, pickled or frozen all year.
It is usually recommended that you put at least 2 seeds in each hole when planting, in case one of the seeds does not germinate. But if you pre-germinated your seeds (see below), you can carefully place just one sprouted seed exactly where you want it. Pea seeds are finicky and enjoyed by many garden critters, so be prepared to replant new seeds into any gaps in your row.
Once the peas have germinated, give them a fence or trellis to climb as they can grow 8-10 feet tall.
Keep the soil moist, but not wet. When you water them, water the soil, not the plant, to discourage disease.
Gently remove weeds by hand so as not to accidentally pull up your pea vines too.
Rotate pea crops every year to prevent soil-borne diseases.
Special Tips for Growing Peas
Get a Head Start
Since peas are one of the first crops you can plant in the spring, to get a good head start, turn over your pea planting beds in the fall, add manure to the soil, and mulch well. Then in the spring when the soil is warm enough, just pull back the mulch and plant your seeds. It’s ok to add compost or composted manure to the soil right before planting if you like, but peas don’t need added fertilizer, which will reduce your harvest.
Pre-Germinate Your Seeds
You’ll get the best germination rate for your peas if you pre-sprout them before planting. To do this you should:
- Moisten a paper towel or cotton cloth. It should be damp, not soaking wet, so as to avoid fungal growth.
- Space the seeds about an inch apart on the towel and carefully roll it up.
- Place the moist towel into a plastic bag or a glass storage container. Since seeds need to breathe, do not seal the bag or container (leave the lid loose).
- Place the container in an area that is about 45-50 degrees F, which is optimal germinating temperature for peas. Check the moisture level daily and remove any seed which has formed mold.
- Sprout the seeds until they have just germinated to avoid breaking off any tender shoots, and then plant them in containers or directly into the garden right away. They are fragile at this stage, so they need to be handled with extreme care.
Maximize Nitrogen
One of the benefits of growing peas is that, as a member of the legume family, peas fix nitrogen in the soil which will help fertilize future plants. By rotating your peas every year into different parts of your garden, you can add nitrogen to your soil, year by year.
To grow a bountiful pea harvest and to fix the most nitrogen in your soil, you will need to add Mycorrhizae inoculant to the planting holes as you put the seeds in the ground. This soil bacteria works symbiotically with your pea roots to help them fix nitrogen in the soil. It will also help protect them from drought and disease to a degree as well. (Get inoculant online here.)
Companion Plants for Peas
Good crops to put near your peas include beans, carrots, corn, cucumbers, early potatoes, radishes, lettuce, kale, cilantro and mint. Peas don’t really like onions or garlic, so plant those in a different part of the garden.
Pea Pests and Diseases
The best way to combat pests and diseases in peas is to prevent them. Choose varieties of pea seeds that are resistant to the pests and diseases in your region, and plant peas in a different spot each year to minimize the risk of contracting or spreading infections. Also use drip irrigation to minimize the spread of disease via water droplets.
Do not compost pea plants with fungal diseases or viruses.
Animals
Baby pea shoots are a favorite food for many backyard critters, including birds, squirrels, rabbits, groundhogs, mice, and more. After planting, you might need to protect your pea seedlings with a physical barrier like a row cover or wire cage until they are large enough to climb the trellis.
Insects
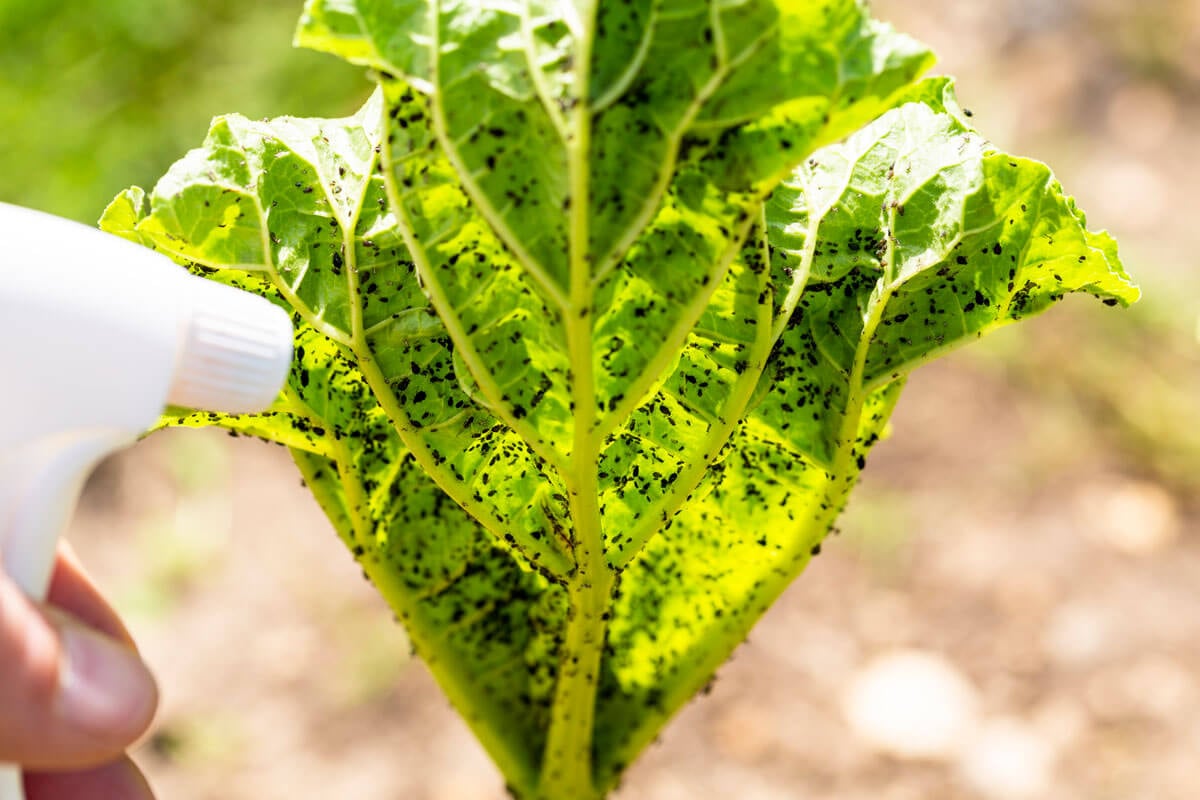
Many insects and their larvae find pea plants as delicious as we do. If your pea plants have been eaten down to the soil, cabbage maggots or cutworms are usually the culprits. Sprinkle wood ash around the base of the plants to prevent them.
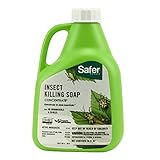
Aphids and thrips can deform the leaves or pea pods, so spray them with a non-toxic, insecticidal soap. Silvery webs on the undersides of leaves may be the work of spider mites, which can also be sprayed with insecticidal soap.
Hand pick spotted cucumber beetles or armyworms to prevent them from chewing holes in leaves.
Pea weevils emerge in spring and lay their eggs in your peas seeds. Once hatched, the larvae munch on the seeds, creating holes, wiping out most of your crop before they can even sprout. Insecticides are useless since the larvae can’t be affected; therefore, the adults must be eradicated.
Using a garden fabric or row cover is one of the best ways to prevent pea weevils. Hand-pick the adults and remove their orange eggs from the plant leaves. You can also use wood ash or diatomaceous earth to to help control both larvae and adults.
Fungal Diseases
Downy mildew, powdery mildew and fusarium wilt are common in peas. Yellowish or brownish spots on leaf surfaces may indicate downy mildew. Improve air circulation and drainage if you discover these symptoms, and keep your garden free of debris. Pick off infected leaves, and spray neem oil preventatively.
Round, white spots anywhere on the plant are signs of powdery mildew. This often shows up late in the season but does not usually result in the loss of the plant. Pick off infected leaves, and use neem oil or milk solution to prevent and treat.
Fusarium wilt causes stunted and yellow plants. Fungicides are not effective in treating it; remove and destroy any infected plants.
Viruses
Aphids spread both mosaic virus and pea enation virus, which can cause brittle, deformed leaves and stunted plants or, in the case of pea enation virus, highly deformed pea pods. Neither virus can be cured.
In the case of mosaic virus, infected plants will produce peas, but the size and yield will be reduced. Plants infected with pea enation virus must be destroyed. Controlling aphids may help, but choose disease-resistant hybrids next season for better insurance.
How to Harvest and Store Peas
Peas can be harvested in the snap or green stage, the shelling stage, or the dry stage. Snap or snow peas are ready for harvest when the pods are still tender, before the seeds start to swell. Shelling peas are ready when the pods are tender and the seeds are round and plump. Dry peas are ready for harvest when the pods are dry and brittle and the seeds inside are hard.
Always pick peas in the morning after the dew has dried. They are crispiest then, and picking dry plants will reduce the chance of spreading any diseases.
Always use two hands when you pick peas. Hold the vine with one hand and pull the peas off with your other hand. Keep your plants well-picked to encourage more pods to grow.
When your peas are done growing once the weather warms up, just snip the stems off at ground level and let the roots decompose in the soil, leaving the nitrogen fixed into the roots for future crops.
All types of fresh peas can be kept in the refrigerator for about 5 days. For long-term storage, you will need to freeze them or can them. You can also let them grow too long and then dry and store them, but I don’t recommend using snow or snap pea varieties for dry peas. A regular shelling pea variety is better for this.
How to Save Pea Seeds
When saving seeds from peas, separate open pollenated or heirloom varieties in the garden by 10-20 feet, so they don’t cross pollenate. Let the pea pods of five or six of your healthiest pea plants turn hard and brown on the vine and shrink against the seeds. You’re going to grow these peas all the way through the dry stage. This is about four weeks after the eating stage.
If your pea pods are not completely dry before the first frost in the fall, pull the plants up by the root, and hang them in a cool, dry location until the pods turn brown and dry. When the pea pods are completely dry, break them open to release the seeds.
Air dry your pea seeds for about six weeks before storing them in a cool, dry place where they will remain viable for 3-4 years. Always keep seeds in an airtight container to keep out moisture and humidity.


