

Is your dairy-free family obsessed with yogurt like mine? This homemade almond milk yogurt recipe is a delicious, affordable option if you and your family love yogurt but are vegan or can’t tolerate dairy products.
Years ago, I made a gallon of homemade cow’s yogurt at a shot. My kids would gobble it up in a few days. It was simple to make and the control over each ingredient made me happy.
Fast forward a few years. We discovered milk caused tummy aches, diarrhea, and heartburn in my kids. It was heartbreaking. My kids loved milk and yogurt! But the cost of non-dairy yogurt was a hard pill to swallow. The way my kids eat yogurt, they kick a pint size yogurt container each by 10am.
I experimented with making my own almond milk yogurt. It was a rough road: Lots of failed yogurt batches and disappointed little kids when a batch didn’t pan out. We made the best of it.
Here are 3 lessons I had to learn the hard way. Don’t make the same mistakes. Let’s save you time, money and frustration.
1. You Must Use Homemade Almond Milk
I have attempted to make yogurt with several varieties of store-bought almond milk. I used the same process I used to make regular cow’s milk yogurt – FAIL! Each and EVERY time.
Then I realized the process was different for almond milk yogurt. So, I tried a bunch of “no-fail” almond milk recipes. Still a fail!
The problem? I did not follow those recipes exactly. I used store-bought almond milk instead of making my own. Anything but homemade almond milk will not work! I’ve tried many brands several times. No exceptions.
I assume the additives in the store bought almond milk mess with the culturing process. I’ve added thickeners and gotten thickened milk, but it didn’t taste or smell like yogurt. The cultures never survived, and sometimes bad mold took over with a pink haze over the top of my yogurt. (If you get that, throw it out!)
Making your own almond milk does take a little more time, but it’s easier than you think it is.
2. You Need to Use a Thickener
Almond milk yogurt, like most non-dairy yogurts, needs a thickener, otherwise it will be very runny.
If you’ve made cow’s milk yogurt, you know it firms up, but not like a cup of store-bought, commercial yogurt, which is full of thickeners. Almond milk yogurt will be even more runny. This is great for use in smoothies, but not yogurt.
I know it’s frustrating when you’re trying to avoid additives right!? We’re going to look at some healthy thickeners options to solve the problem.
3. You Cannot Reuse Your Yogurt Culture
I read about people reusing the almond milk yogurt culture. I’d love to smell their yogurt to see if it has that distinct yogurt smell. I imagine it is just thickened milk. Yogurt should be tangy.
Make sure you use a new culture each time for almond milk yogurt. Yogurt starter culture produces the most consistent yogurt results.
I’ve heard success stories using a high quality probiotic capsule. I prefer the starter culture. I know it contains cultures specifically found in yogurt. The preference is yours.
The US government requires Lactobacillus bulgaricus and Streptococcus thermophiles in yogurt. Look out for a probiotic with those strains. (Source: FDA)
I found the FDA regulation below during my research. I had to share, it made me laugh. And shake my head.
“Shall possess a firm, custard-like body with a smooth, homogeneous texture. A spoonful of yogurt should maintain its form without displaying sharp edges.”
(Source: FDA)
Sharp edges…. Really?!?!
Since you don’t want sharp edges in your yogurt either, let’s talk thickeners. Get your yogurt to the perfect texture.
Related
Thickeners for Almond Milk Yogurt
Thickeners can be tricky. I’ve done a lot of experimentation with almond milk yogurt thickeners. More than I’d care to admit.
Some thickeners were okay, others were a flop. Texture and thickness were the biggest issues. You want something smooth, not grainy.
I’m sure you have a preference on your yogurt thickness too. Your preference might not jive with others in your home. I like a thicker yogurt, my 6-year-old loves when it is a runny mess. He’s always rooting for me to mess something up.
I make our yogurt fairly thick and whisk his a little to get the consistency he likes.
Here are the 3 thickeners I use in my yogurt.
Arrowroot Flour
Homemade almond milk yogurt has the tendency to separate. Arrowroot flour is great to thicken the yogurt and keep the yogurt from separating. So disappointing when you end up with a watery mess on the bottom and a custard like yogurt on top.
You’ve got to keep the milk evenly dispersed.
Cornstarch can be used as a substitute.
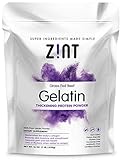
Gelatin
This is my favorite way to thicken my yogurt. I use 100% grass-fed gelatin from animals raised sustainably on pasture. I’m sneaking a healthy food in for my kids to eat without them knowing. It works great and has a consistent texture.
If you’re vegan, you can swap it out for agar agar, but agar agar is a stronger thickener, so I use 1 teaspoon for every Tablespoon of gelatin. Make sure you’re using powdered agar agar instead of the flakes.
Interested in more information about thickeners? Check out Cultures for Health’s thickeners resource.
Sunflower Lecithin
Homemade almond milk will separate. I use sunflower lecithin to keep the milk from separating if I’m making almond milk. You do not need to add lecithin if you are making your almond milk into yogurt.
Add 1 teaspoon of sunflower lecithin per 4 cups of almond milk. I add the sunflower lecithin once I strain the milk. A quick blend in the mixer does the trick.
I struggled with breastfeeding my 4th child. Sunflower lecithin capsules saved my breastfeeding experience. It magically unclogs your milk ducts, which saved me from lots of struggle and pain. I hope it does for you, too.
Now, let’s make some almond milk yogurt…

Homemade Almond Milk Yogurt
Equipment
Ingredients
- 4 cups filtered water
- 1 cup raw almonds
- 2 Tbsps. arrowroot flour, or GMO-free cornstarch
- ⅛ cup raw cane sugar
- 1 Tbsp. grass-fed beef gelatin, or 1 tsp. agar agar
- 1 packet non-dairy yogurt starter, or 1 capsule lactobacillus probiotics
Instructions
Soak Your Almonds
- Pour 1 cup of raw almonds into a liquid measuring cup and cover with filtered water. Fill measuring cup with water to the 2 cups line.
- Let it sit in the fridge overnight.
Make Almond Milk
- In the morning rinse and drain your almonds.
- Pour your soaked, rinsed and drained almonds into a blender and add 4 cups of purified water. I use a Vitamix. Blend for a few minutes until they are well pulverized. If your blender has less power, make sure to pulverize the almonds for a few minutes.
- Pour the milk mixture into a nut milk bag to strain out almond pulp.
- Let the bag drain and gently squeeze the bag 15 minutes later. Remove as much milk as possible.

- Reuse the almond pulp by baking it in the oven at 200 for 3-4 hours until it’s hard. Then grind it up and add the powder to baked goods or homemade granola. There’s no waste and it adds some extra protein.

Sterilize Your Equipment
- Sterilize the equipment you’ll be making your yogurt in, including spoons and the container you will incubate the yogurt in. You can get mold if your equipment is not sterilized. Save yourself from a failed yogurt batch.
- Pour boiling water over your equipment before using it. I boil water in my tea kettle to make pouring easy. Or you can run your equipment through the dishwasher.
Heat the Milk
- Add enough water to your almond milk to equal 4 cups.
- Pour your milk into a saucepan. Reserve 1 cup of almond milk in a separate bowl.
- Mix 2 tablespoons of arrowroot powder into the bowl of 1 cup of milk. Whisk with a fork until incorporated.
- Heat the milk until it begins to bubble, simmer and thicken. This will sterilize your milk and prevent bad bacteria from cultivating.
- Pour the arrowroot mixture and 1/8 cup of sugar into the saucepan. Continue to whisk over heat for 5 minutes. Stay with it: It can boil over very quickly.
- Remove from the heat and watch your temperature as it decreases. You’ll need a candy thermometer for this.
Add Your Culture & Make Yogurt
- Once your milk has reached 110 degrees F, you are safe to add your culture. Anywhere between 100 and 110 degrees is the sweet spot.

- Incubate your yogurt at 110 degrees for 6–24 hours, depending on how tart you like it. The longer you incubate it, the more tart it will become. I incubate for 8 hours.
- Here are some common ways to incubate your yogurt:
– In the oven with an oven light on
– On a heating blanket on low setting with towels
– In a pressure cooker if you have a yogurt setting
– Proof setting on your oven if you have the setting
A quick search will give you more incubation ideas. Find the best method for you. - After incubation, refrigerate your yogurt overnight. It will take some time to set.
- Add flavoring by stirring in a bit of fruit or jam until combined.

Nutrition
Recommended for This Recipe


What’s your favorite way to enjoy your homemade yogurt? I’d love to hear from you in the comments below.
Updated February 3, 2020.


